- Electronic Universal Testing Machine
-
Tensile Testing Machine
- Hydraulic universal testing machine
- Dynamic Fatigue Testing System
-
Robot Automated Testing Systems
- Impact Testing Machine Series
- Compression Testing machine
- Torsion Testing Machine
- Bending Testing Machine
- Creep and Rupture Testing Machine
-
Elastomeric Bearing Testing Machine
-
Cupping Testing Machine
- Spring Testing Machine
-
Other testing machine
- Paper and Package Test Equipment Series
- Textile Test Equipment Series
- Optical Test Equipment Series
- Spectrometer
- Testing equipment for masks and protection cover
- Plastic Pipes and Rubber Test Machine
- Other testing machine
- Video Measuring Machine
- Optical Profile Projector
- Coordinate Measuring Machine
- Force Gauge
- Mechanical Machine
- Hardness Tester
-
NDT Series
-
Microscope
- Metallographic
- Testing machine accessories
- High And Low Temperature Chamber
-
Insulator Testing Machine
-
Friction and Wear Testing Machine
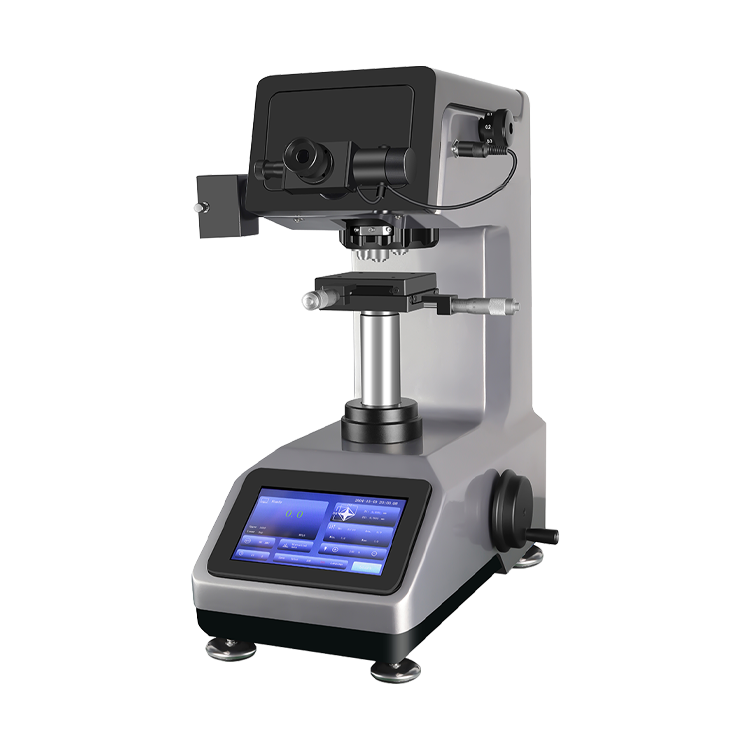
HTMV-1000ATH Automatic Turret Micro Hardness Tester


Description:
HTMV-1000ATH touch screen automatic turret digital display microhardness tester is mainly used for micro Vickers hardness determination of various metals and some non-metallic materials. ), non-ferrous metals, heat
post-treatment parts, various tiny and thin parts, glass, ceramics, agate, gemstones, etc. for hardness
determination, and is also suitable for carbonization, effective depth of quench hardening layer, coating layer,
surface coating and welding Determination of heat-affected parts of parts. It can also be used to observe the
internal metallographic structure of various metal parts and to collect, display and print out images. It is especially
suitable for measuring the hardness gradient distribution curve of the workpiece and measuring the surface
hardness and effective hardened layer depth of the gear after heat treatment.
Technical Parameter:
|
Name |
Specification |
|
Test force |
10gf, 25gf, 50gf, 100gf, 200gf, 300gf, 500gf, 1kgf |
|
conversion scale |
0.098N, 0.245N, 0.49N, 0.98N, 1.96N, 2.94N, 4.9N, 9.8N |
|
Smallest unit of measure |
HRA, HRB, HRC, HRD, HRF, HV, HK, HBW, HBS, HR15N, |
|
Test mode |
0.0025μm |
|
Hardness test range |
HV/HK |
|
Test force application method |
5~3000HV |
|
Turret rotation method |
Automatic (loading, holding, unloading) |
|
Objective lens |
automatic |
|
Eyepiece |
10X, 40X |
|
Total magnification |
10X |
|
Test force dwell time |
100X (observation) 400X (test) |
|
X-Y test bench size |
1~60s |
|
X-Y test bench maximum movement |
100*100mm |
|
Data output |
25*25mm |
|
Maximum height of specimen |
Touch screen readout, built-in printer |
|
Distance from the center of the indenter to the inner wall |
90mm |
|
Power supply |
110mm |
|
Executive standard |
AC220V±5%, 50~60Hz |
|
Dimensions |
ISO 6507, ASTM E384, JIS Z2244, GB/T 4340.2 |
|
Host weight |
405*290*480mm |
|
Weight |
About 40KG |


